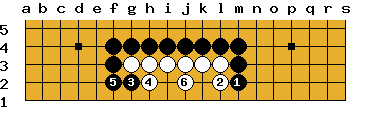
On the third line four will die, but six will live.
Now we consider groups on the third line.
DIAGRAM 1
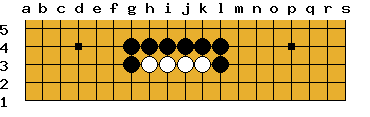
Four die...
Let's see what White might try. First, try to slip under the black stones;
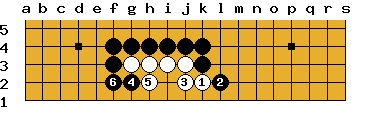
DIAGRAM 2
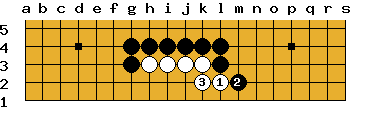
Black blocks with 2, and White has to connect at 3.
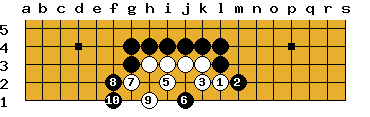
DIAGRAM 3
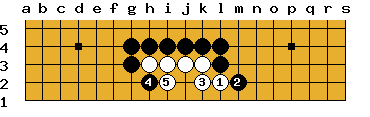
Now Black attacks from the other side and White blocks. It looks natural for Black
to connect and protect that one stone, but instead...
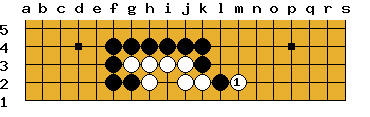
DIAGRAM 4
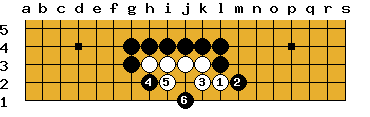
This point at 6 is clearly a key point that prevents White from making two eyes, but
White can now cut and capture Black 4. Black 8 forces White to capture, but Black
10 ensures that White now has a
false eye.
DIAGRAM 5
Remember Diagram 3, when Black did not connect that stone? What if Black
had connected at 6?
DIAGRAM 6
This White move threatens to escape. It won't work, but it gets complicated and
there are plenty of opportunites for Black to make a mistake. Try some variations
for yourself.
DIAGRAM 7
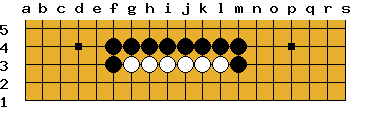
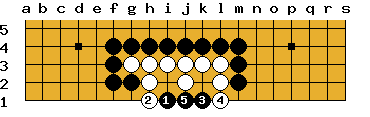
...six live
Here is the basic setup for six white stones on the third line.
DIAGRAM 8
Since the proverb says these are alive, White does not have to play, but if Black
attempts to reduce the eye-space as in Diagram 9, White 6 saves the group.
DIAGRAM 9
You may realize that Black can still attack, with these moves:
DIAGRAM 10
but the result will be that White is alive in
seki. If you don't understand the term
click to see an explanation.
This means that the White stones are still alive but that there is no
White territory. So if Black does not attack after White 6 in Diagram 9,
White can play at j1, and gain (at least) 2 points of territory.
| | | | | | | | | | 